

How Can I Add Extra Volume On Vocal On X32
In this guide, we will bear witness yous how to go started using some of the X32'south features. Nosotros'll show you how to get sound out, create a monitor mix, record on a reckoner, and much more than. If you are setting upwards for the first fourth dimension, follow our X32 Setup Guide first and come up dorsum when you're finished. Follow each of the sections below to get started.
- X32 channel controls
- Input point and aqueduct strip settings
- Road signal to an output
- Create a mix bus for phase monitors
- Apply the aqueduct strip sends
- Employ the aqueduct faders as sends
- Use the mix bus faders equally sends
- Monitor, talkback, and oscillator generator
- What is the monitor mix?
- X32 talkback configuration
- Oscillator generator for testing
- X32 USB recording
- Recording X32 to a figurer
- Record to a USB drive
- Related content
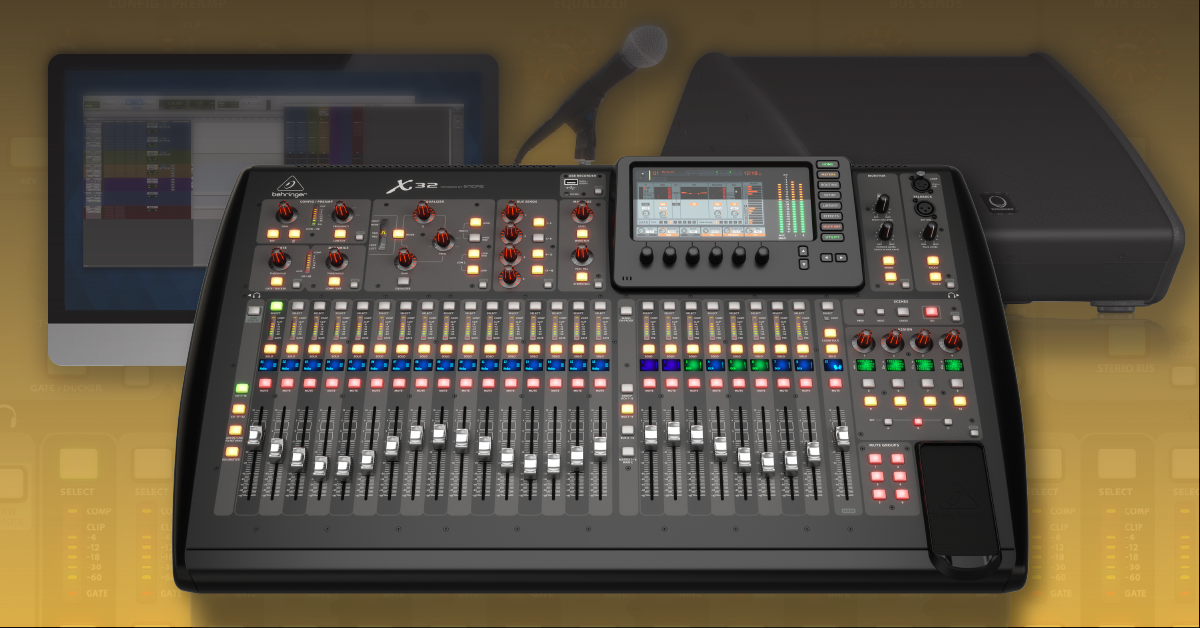
X32 channel controls
Managing your signals on the X32 involves routing and processing. Each aqueduct may be unique, then that means a lot of things tin happen at one time. To get started, let's connect a mic and process the signal with the X32'southward aqueduct strip. Once done you tin route the point to either the principal speakers or a stage monitor.
Input point and channel strip settings
Connecting a microphone and getting input point is pretty simple. The local (born) inputs volition be selected by default, just yous can always change them to digital ophidian inputs from the ROUTING menu. The input indicate volition testify up on the channel information technology'south connected to. Press the aqueduct'southward select push button to control its channel strip settings.
- Connect a microphone to IN 1 and press the SELECT button on aqueduct 1.
- Press the Dwelling button to see the channel strip starting with the CONFIG/PREAMP folio.
- Apply the encoders to conform the aqueduct settings and press the LAYER buttons to change which settings the encoders control.
- Run across the sub-menus for specific channel strip functions by pressing their respective VIEW button or browsing with the PAGE SELECT buttons.
- Speak into the microphone and turn upward Gain or ENCODER 1.
- Increase the gain so that the signal is as loud as possible without distorting (ruby-red LED meters).
- Turn on phantom power for condenser microphones or agile DI boxes by pressing the 48V button.
- Press the LAYER buttons to modify which settings the encoders command.
Gate
A gate is an expander with a stock-still, infinite ratio. Gates are used to automatically silence the channel when its level does not exceed the threshold.
- Press GATE/DUCKER or ENCODER ane to turn on the GATE.
- Rotate ENCODER 2 to change betwixt the alternate expander and ducker modes.
- Apply ENCODER 5 to enable optional insert effects (see EFFECTS menu).
- Press the LAYER buttons to change which settings the encoders control.
Dynamics (DYN)
A compressor reduces and smoothes out the signal's amplitude (aka volume or dynamics). Suit the ratio and threshold settings to change how the signal's dynamics are smoothed out. Set a loftier ratio similar 10:1 to apply the compressor as a limiter.
- Press COMP/EXP or ENCODER one to turn on the DYNAMICS.
- Press ENCODER ii to change between compressor and expander modes.
- Press the LAYER buttons to change which settings the encoders control.
Equalizer (EQ)
An equalizer, or EQ, is used to alter the volume level of certain frequency bands. Enable the equalizer to shape a signal'south depression, middle, and high frequency content.
- Press Blaster or ENCODER 6 to enable the equalizer.
- Rotate ENCODER 6 or press the LAYER buttons to alternate between the 4 fully adaptable frequency bands.
Bus Sends
The Bus Sends control the channel level sent to their respective busses. Press the 1-4, 5-8, etc. buttons to select which motorcoach sends the encoders control.
- Yous can besides apply ENCODER 1 to scan banks of four at a time and utilize ENCODERS iii-6 to control their respective transport level.
- Printing the LAYER buttons to modify which settings the encoders control.
Main Double-decker
Control each channel's output settings like Pan, Solo, Mute, and Mono mix level. This bill of fare is particularly useful for metering a channels output level on the screen.
- Solo, Mute, and Fader levels are typically done with the channel faders and buttons rather the card's encoders. Turn the channel fader up to send the channel to the Primary mix.
Route signal to an output
To get signal from your main mix connect your main speakers to the last two XLR outputs (15-16 or 7-eight). In one case connected, turn upward the Primary fader and your speakers will receive the signal. With the MAIN fader at unity, turn up the speaker/amplifier levels to a satisfactory level. Getting signal out of the X32 commonly works with the default configuration, simply the routing settings can exist customized to adapt your needs.
The X32's terminal two XLR outputs are assigned the Primary mix by default, but each analog output tin be assigned to receive a different audio source. By default, the other XLR outputs are assigned their matched mix motorbus (Mix Bus 1 for OUT 1, 2 for 2, etc.) and each TRS aux output its respective insert. Follow these steps to assign which signals are sent to each output.
Go sound from the mains
The main mix level is controlled by the Master fader and outputs signal from OUT 15-16 (X32) or OUT 7-8 (compact, producer, and rack).
- Set the chief fader level to 0 (unity) and adjust the speakers to the optimal level.
- A microphone with plenty gain is good for setting speaker levels, but y'all can also connect a phone or tablet to an AUX input to play dorsum line level audio. Simply brand sure the device and the music app's output volume is turned all the way up.
- Use each aqueduct fader to create the main mix and the Chief fader to command the principal mix level.
Become audio from other outputs
To get output from AUX OUT 1-half dozen, OUT i-14 (X32) or OUT 1-half dozen (Meaty, Producer, and Rack), you must assign the input or mix bus which will become to each XLR or TRS output.
- Press the ROUTING push button and use the PAGE select buttons to view the out i-sixteen carte du jour.
- Assign a audio source to each XLR or TRS output:
- Rotate and press ENCODER 1 to select the Analog Output.
- Rotate and press ENCODER 3 to select the Category and ENCODER four to select the specific sound source (main or bus mix, direct-out, etc.) and Tap betoken. Keep below to learn how to create a mix bus.
Create a mix motorcoach for stage monitors
Your X32 is first-class at creating aux or stage monitor mixes. On an analog, mixer you would employ each aqueduct'southward Aux send to transport level to some other output, simply on the X32 they're called Double-decker sends. Yous can create a mix bus subsequently selecting it for an output's signal source within the ROUTING menu. Apply each channel's Autobus Sends encoders to adjust its level sent to the respective mix bus. You lot can also use the X32'south Sends on faders feature to control the send level with aqueduct faders.
Tap points: pre-fader, and mail-fader
After assigning a audio source to an output you also have the option to select where (or rather when) the signal is sent from, called the tap betoken. That means you can cull to ship a signal before (pre) or afterward (post) its level fader and mute controls. Usually, phase monitor sends are pre and furnishings sends are post. Different situations will enquire for different configurations, simply go on this in mind when setting upwardly your mix.
Utilize the aqueduct strip charabanc sends
- Printing the channel's SELECT button.
- Turn up the BUS SENDS encoder for a given mix bus and use the one-4, 5-6, etc. buttons to select which group of four sends to command.
- Y'all can also control a selected channel's send settings from its sends page. From in that location you lot can employ the menu encoders to adjust level and select the tap betoken (pre, post, etc.).
Utilize the channel faders to control send level
- Press the Jitney i-viii push button, press your mix bus' SELECT push, and so turn upwards its level fader.
- Press the SENDS ON FADER button. Each aqueduct's fader will at present command its send level to the selected mix bus.
- Apply the channel faders to create the mix, the passenger vehicle level fader to arrange the mix level, and and then press SENDS ON FADER to exit the mix bus.
Employ the mix bus faders to control ship level
- Press your channel's SELECT push.
- Printing the Bus ane-viii button and and so SENDS ON FADER.
- Apply each mix coach fader to suit the selected channel's ship level to each corresponding double-decker. Press SENDS ON FADER to finish adjusting the sends.
Monitor, talkback, and oscillator generator
Whether you're in a live or studio environment, the X32'southward monitor, talkback and oscillator generator features are essential engineering science tools. They may not be necessary for your setup but can improve communication and efficiency during setup and soundcheck.
What is the monitor mix?
The monitor mix is typically used past the engineer to listen to one or more than channels at a time without affecting the main or stage monitor mixes. Connect to the X32's headphone or monitor outputs to listen to the monitor mix. That means you lot'll hear either the Main L/R mix OR each aqueduct or jitney with SOLO engaged.
Solo and adjust efficiently
Turn on Solo follows Select to rapidly monitor private channels and simultaneously suit their channel strip. Use the Solo button to solo a aqueduct, then utilise the Select push button to choose which channel to monitor and command.
- Click the Monitor area'due south VIEW button and view the monitor page.
- Use the far right encoder to select the sound source y'all want to monitor
- (optional) Adjust the monitor'south input level with Source Trim.
- Monitor level controls the monitor mix's level. Utilise the headphone or monitor/control room knobs to adjust their output level.
X32 talkback configuration
Talkback is specially useful when the engineer needs to talk to the performers in either a live or studio environment. In that location are two talkback menus and with the post-obit controls: Talkback A/B for engaging talkback, Microphone A/B for using an external microphone, and Lamp Dim for on/off and dim. Talkback A and B can each have a dissimilar Talk level, Button mode, and Talk destination. This tin can exist useful when y'all need to talk to the performers and assistant engineer separately. For example, assign talkback A to the monitor engineer'due south mix double-decker and B to the performer's.
48v phantom power
The external microphone input automatically has 48v (phantom power) enabled for condenser and active dynamic microphones.
- Turn on Talkback/AB. If using an external microphone continued to EXT MIC, plow on Microphone A/B, too.
- Engage the respective Talkback A or B buttons, speak into the talkback mic, and adjust the gain with the TALK LEVEL knob.
- Select the destination(s) and adjust the level with Talk Level (Encoder 3).
Oscillator generator for testing
The oscillator utility is specially useful for alive sound reinforcement audio checks. The oscillator can be routed simply like the talkback feature, but a test bespeak is heard instead. Utilize this to exam and verify your routing settings and speaker connections. You can also use the generator to test the acoustics of a room or venue, oftentimes chosen "ringing out a room". Try the Sine wave and adjust the Frequency to provoke resonant frequencies. This will requite you feedback about what blazon of EQ or dynamic corrections could be made to create a clearer mix.
- Select the output Destination (Encoder 6).
- Select the Oscillator Blazon.
- Press GENERATE (Encoder 1) and adjust the betoken type or level as needed. When you lot do, all other bespeak sent to that destination is muted until the oscillator is turned off.
X32 USB recording
Your X32 has at least two great ways for recording. The included expansion carte connects to your figurer for USB audio streaming and recording. The built-in USB pollex drive port tin too exist used to tape a stereo mix.
Recording X32 to a calculator
The USB connection on your X32 tin can be used to record audio and MIDI to a DAW. While most users volition use this feature for multi-track recording, in one case configured, the channel faders can even be used as a DAW controller. Follow these steps to connect the X32 to your reckoner as an audio/MIDI recording device. The USB card'south outputs (what's leaving the X32 and going to your computer) can be customized. This is helpful if you want to record a combination of specific inputs, mix busses, or furnishings. Open the ROUTING card, select the CARD OUT tab, and select new sound sources for the card's output channels.
- Connect the X32 to your figurer via USB. Windows users volition first need to install the latest commuter available from Behringer. No driver installation is required for Mac.
- Launch your DAW and select the X32 as the audio input/output device.
- Create tracks in your DAW and assign each input to the correct input aqueduct.
Record to a USB drive
The X32 also has a built-in USB recording feature. It supports xvi-fleck WAV files and will playback/record at the X32'southward sample charge per unit. Brand certain to format the USB drive FAT (FAT32) with a PC or Mac before using it for recording or playback. Most new USB drives will piece of work, just not all are built for audio read/write speeds, so test recording and playback to make sure it works.
Change sound source
Press the Page right button to view the Configuration tab and change the recording source. The main stereo mix is selected by default.
Important: Do not remove the USB bulldoze until the admission light turns off!
- Using a PC or Mac, format the USB flash bulldoze to Fatty.
- (optional) Backup your USB bulldoze's files as formatting volition delete them.
- Connect the USB flash bulldoze to the X32's USB jack and press the VIEW button.
- Utilize the encoders to test recording and playback.
Related Content
- Behringer X32: Setup and Connections
- Behringer X32: S16, S32, SD8, and SD16 Setup
- Behringer P16: Setup
When y'all demand aid, Sweetwater has the answers!
Our knowledge base contains over 28,000 expertly written tech articles that will give you answers and help you get the most out of your gear. Our pro musicians and gear experts update content daily to keep you informed and on your mode. All-time of all, information technology'due south totally FREE, and information technology'southward just some other reason that you lot go more at Sweetwater.com.


How Can I Add Extra Volume On Vocal On X32,
Source: https://www.sweetwater.com/sweetcare/articles/behringer-x32-sound-routing-and-recording/
Posted by: geerdinduch.blogspot.com
0 Response to "How Can I Add Extra Volume On Vocal On X32"
Post a Comment